Introduction
Hello my name is Peter and I’m the new graphics and engine programmer. New is not really the correct word since I have been working at Frictional for a year now. During this time I have updated the engine and added a lot of new graphic features. This will be the first of my blog posts descripting the changes that have been made.
HDR
One of the biggest changes to the the new engine is the introduction of HDR (High Dynamic Range) Lighting. This is a technique to increase the detail of the lighting system. The benefit of using HDR is that bright things can be really bright, dark things can be really dark, and details can be seen in both.
In nature there is no limit to how bright something can be. The difference between a 60 W light bulb and sunshine hitting the earth is around 10 000 luminance (cd/m^2). This means that we need a way to store high intensity values while keeping the quality and precision of the dark areas. Thankfully there already exists a method for storing such values - by using floating point numbers.
We use a 16-bit fp RGBA buffer to store our lighting. This gives us enough of a dynamic range without taking up too much memory.
Tone mapping
A normal computer monitor can display 8-bit colors between the value of [0..1]. Because of this the monitor can not display a 16-bit HDR image directly. To be displayed the image will have to be converted to 8-bit while keeping as much of the details as possible.Tone mapping is the process of converting an image of dynamic range to one with a clamped range between [0..1].
The simplest method for doing this is to use the Reinhard tone mapping algorithm.
vec3 color = x / (x + 1.0)
No matter how high x gets the final value will always stay between [0..1]. The problem with Reinhard is that it desaturates your dark colors and removes contrast. In the brighter parts of the image Reinhard produces great result with its soft highlights.
What you want to have is an algorithm that preserves the saturation of the color in the dark areas and that keeps as much of the contrast as possible.
I ended up choosing an algorithm created by John Hable for Uncharted 2.
vec3 Uncharted2Tonemap(vec3 x)
{
float A = 0.15;
float B = 0.50;
float C = 0.10;
float D = 0.20;
float E = 0.02;
float F = 0.30;
return ((x*(A*x+C*B)+D*E)/(x*(A*x+B)+D*F))-E/F;
}
 |
| Left: Long curve, Right: S-curve near dark values |
This algorithm is based on a filmic tone mapping algorithm created by Kodak. It keeps the nice highlights from Reinhard while using a slightly S-shaped curve too keep the dark colors saturated.

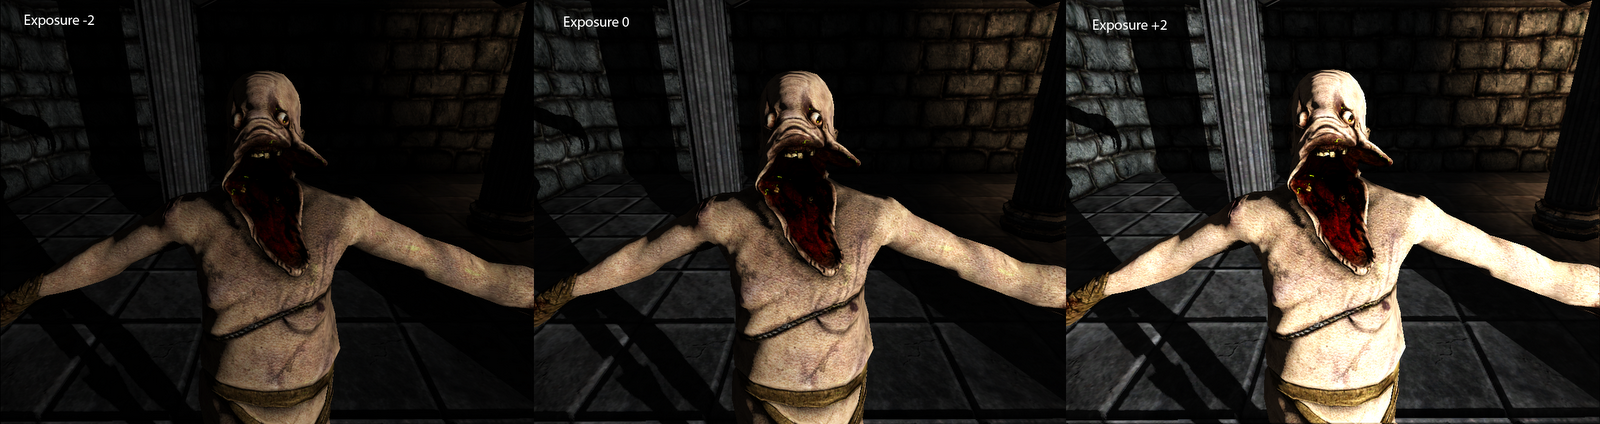
Exposure
If you have been sitting in a dark room for some time and walk out into the sun, your eyes will not be ready for the bright light and you will have to squint. After a while your eyes will have adjusted to the light and it will not bother you anymore.Exposure is a way to control the intensity of light that gets passed through the lens. In the eye this is controlled by the size of the pupil and in a camera it is done by selecting for how long the sensor should be active.
There are a few different ways to control exposure in a game. It can be controlled automatically by storing the average luminance over a few frames and calculating a exposure from that value.
We choose to go with a much simpler method that lets the artists control the exposure by dividing the level into areas that have different exposures. So in a dark area the exposure can be increased and in an outdoor area the exposure can be decreased.
vec3 color = Uncharted2Tonemap(scene_color * exposure)
White Point
A white point is used to increase the contrast of the image. This is the value that is selected to be the brightest any pixel can be. Pixels brighter than the white point will be clamped to 1.0.vec3 color = Uncharted2Tonemap(scene_color * exposure) / Uncharted2Tonemap(white_point)
HDR Bloom
When a pixel is brighter than the white point it can be used to generate an additional post effect called HDR Bloom. Pixels that get too bright should start bleeding over to other nearby pixels, producing a halo around them. It is a subtle effect that adds realism to the image.To solve this I use a few render passes. First a bright pass is applied to the image which removes all pixels that are below the white point and scales down all the pixels that are above it. The result is then blurred to create the halos. The blurred image is then added to the original image. The HDR Bloom effect must be performed before the tone mapping.

Final Thoughts
I would say that HDRL and filmic tone mapping is the most important part of any rendering pipeline. It greatly increases the quality of lighting and will make your game look much more realistic.But HDR and tone mapping is all for nothing if your calculations are not done in linear color space. My next tech feature will focus on gamma correction and the linear color space.